Window Components Terminology
— Collectively, the sill and jambs are called the “window casement” or “frame.”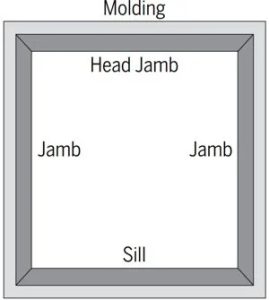
Installing custom blinds, shades and shutters may seem daunting but it can be easy by using some standard tools and following our simple guidelines. For complete and detailed instructions, please refer to the specific product below.
General Installation Preparation
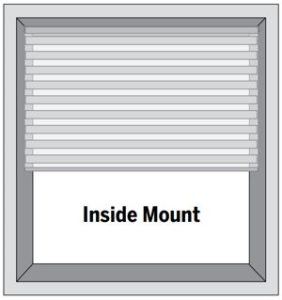
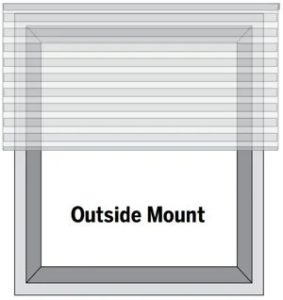
— Identify Inside vs. Outside Mount
— Gather everything you need ready before installation
— Double check packaging to make sure you have all the necessary hardware
What You’ll Need to Install Blinds & Shades
— Metal Tape Measure
— Screwdrivers (both flat & Phillips head)
— 1/4″ Nutdriver
— Safety Glasses
— Drywall Anchors
— Pencil
— Drill with Bits
— Level
— Ladder (if necessary)
How to Install Inside Mount Blinds or Shades
Before marking bracket locations, ensure that your bracket
placement will not interfere with any components inside the headrail.
How to Install Outside Mount Blinds or Shades
IMPORTANT: The brackets must be flush against a flat mounting surface. Do NOT mount brackets on curved molding.
Window Components Terminology
— Collectively, the sill and jambs are called the “window casement” or “frame.”
Subscribe to our newsletter and get the latest trending products and offers updates.
We have something special for you
Use above code to get 20% off for your first order when checkout. Don't miss it.
We care about your privacy
In order to provide you a personalized shopping experience, our site uses cookies. By continuing to use this site, you are agreeing to our cookie policy.
Don't have an account yet? Sign up
No items in your cart. Go on, fill it up with something you love!
Start Shopping Now